Plugin features full 2-way synchronization with Google Calendar. You have option to synchronize on two levels:
- Syn global Google Calendar that will block corresponding time range for all appointable products on your site.
- Sync staff Google Calendar that will block corresponding time range only for appointable products where they are assigned to.
Step 1: Create Project in Developers Console
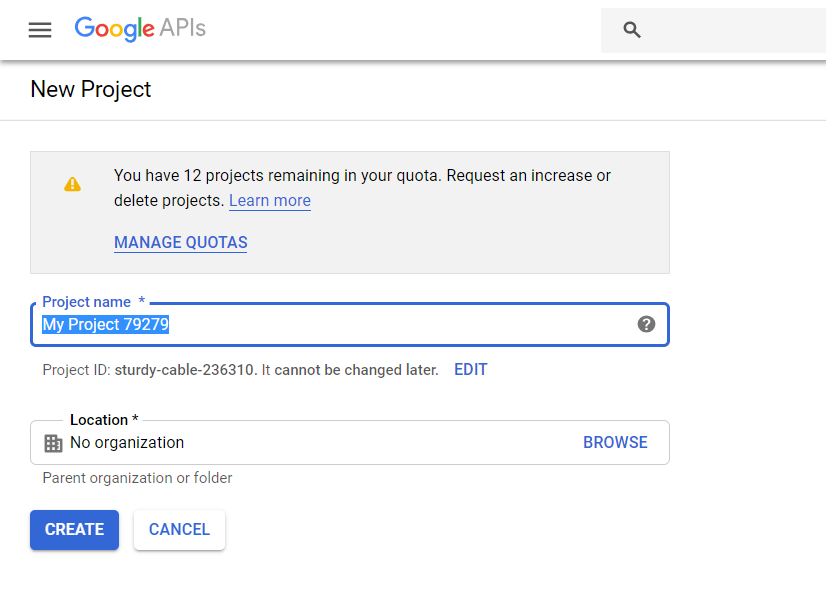
Create a new project in Google Developers Console.

Click on a NEW PROJECT button. In new screen set your project name.
Step 2: Enable the Google Calendar API
Once the project is created, select the created project.
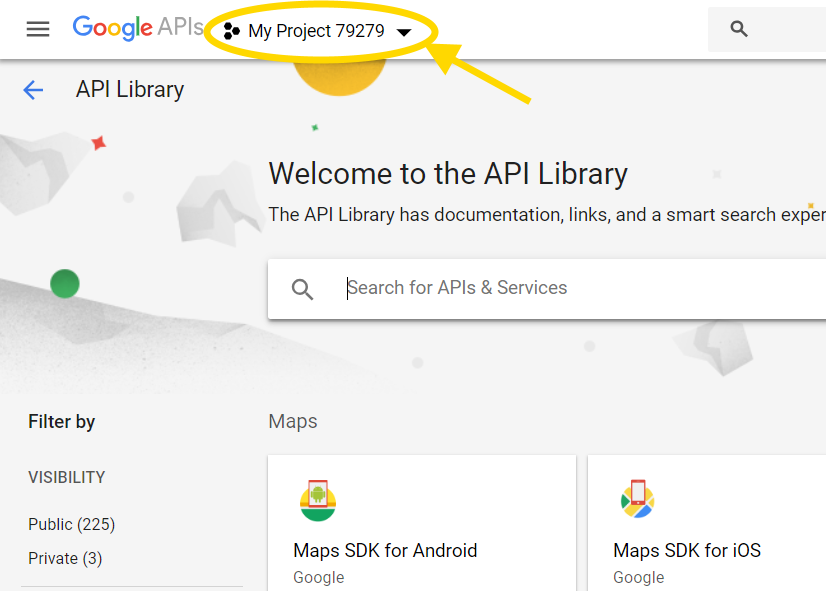
You should be inside the API Library directory. Choose the Google Calendar API.

Enable the Google Calendar API.

Step 3: Create Credentials
Once redirected to the project Overview page, select CREATE CREDENTIALS.

Alternatively, you can also view the credentials page inside API Manager > Project > Credentials page. There, select Create Credentials and click on OAuth Client ID.

You can now proceed with setting up your credentials.
- For “Which API are you using?” select “Google Calendar API”.
- For “Where will you be calling the API from ?” select “Web browser (Javascript)”
- For “What data will you be accessing?” select “User data”
- Then click on the button that says “What credentials do I need?”

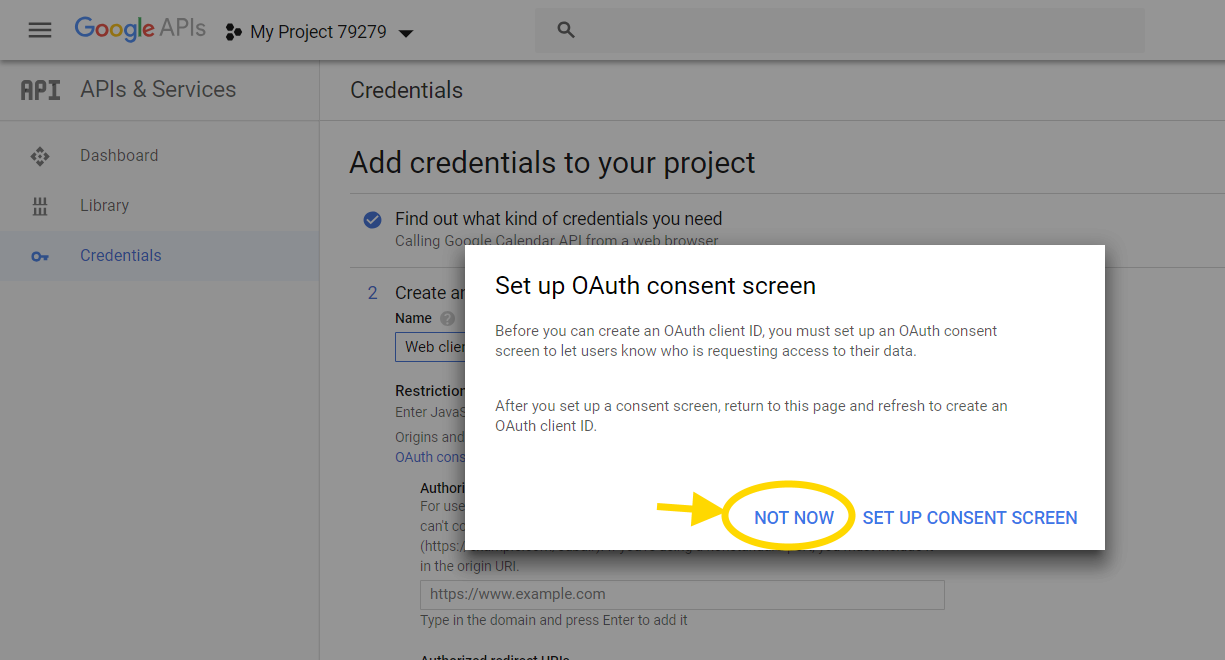
When you are prompted to setup OAuth Consent Screen, skip it for now as we will configure OAuth Client ID first.
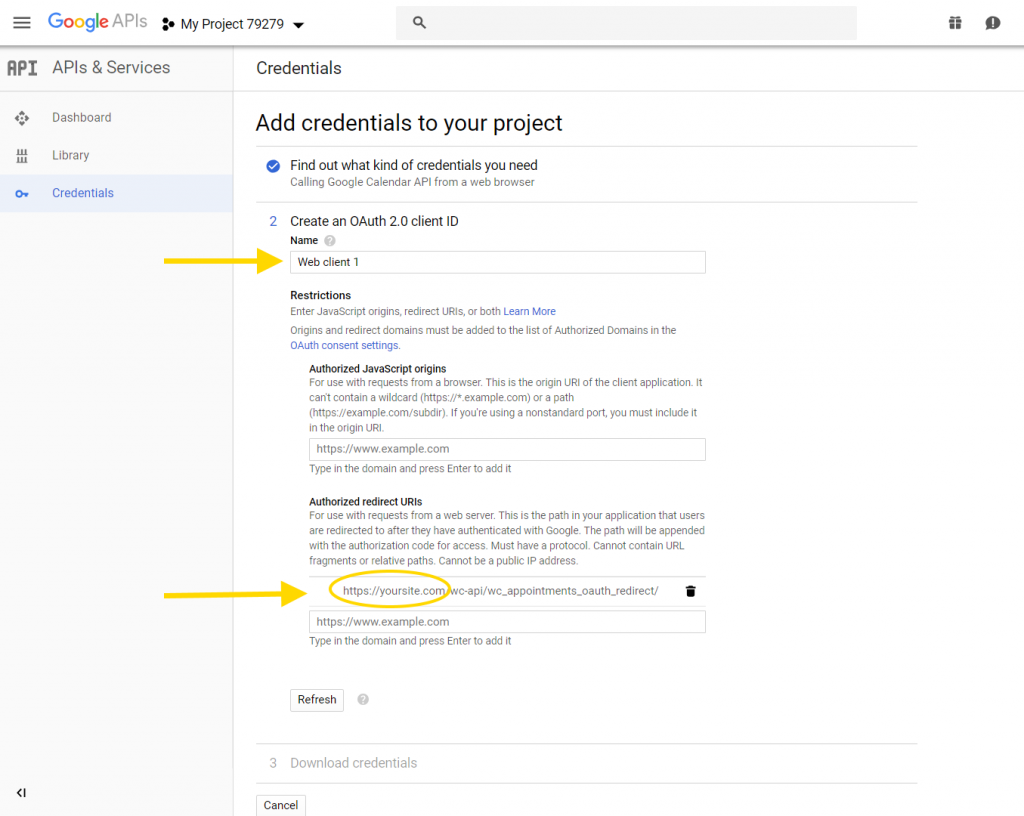
OAuth 2.0 Client ID setup screen:
- Add a “Name“ for the project.
- Leave “Authorized JavaScript Origins” blank/empty.
- For “Authorized redirect URIs“ add (
yoursite.comas your domain):https://yoursite.com/wc-api/wc_appointments_oauth_redirect/ - Now click on “Refresh” button and proceed with SET UP CONSENT SCREEN.
Step 4: Set up OAuth 2.0 Consent screen
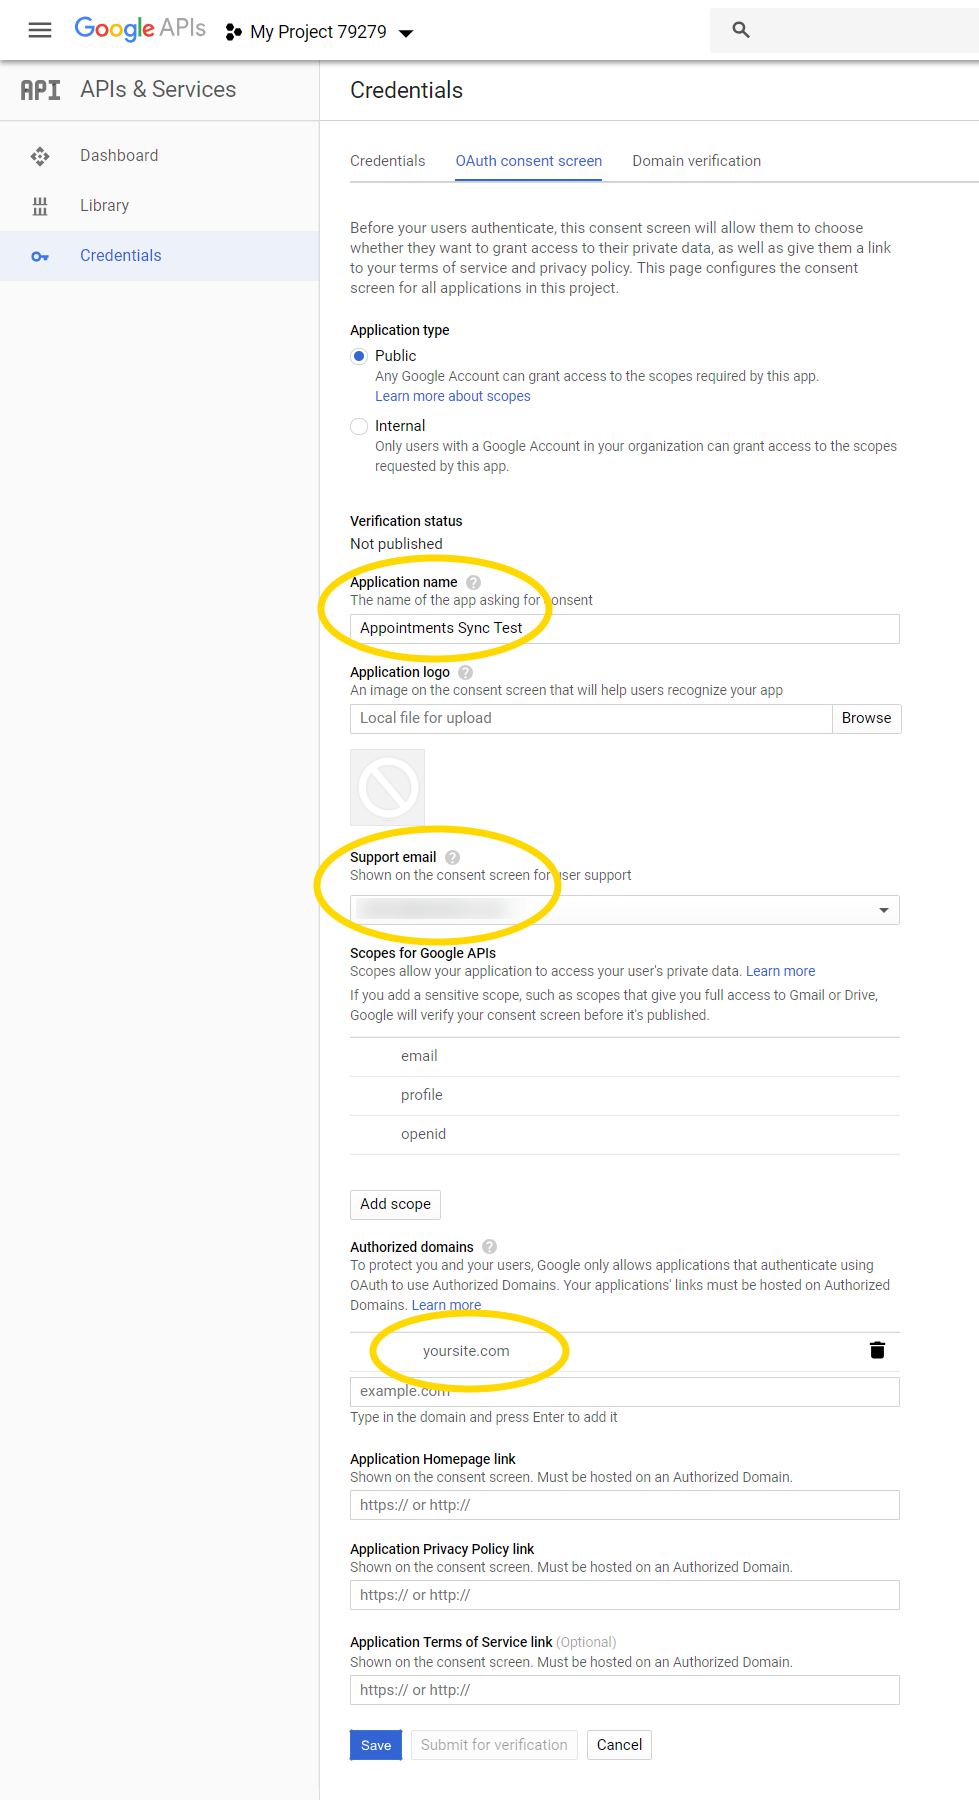
OAuth consent screen is the screen you will see when linking your Google account to your site. Make sure to choose Application name your will recognize and add your site to the list of Authorized domains, otherwise you will not be able to get credentials. After you have set up your consent screen, click Save.
Step 5: Get Credentials Keys
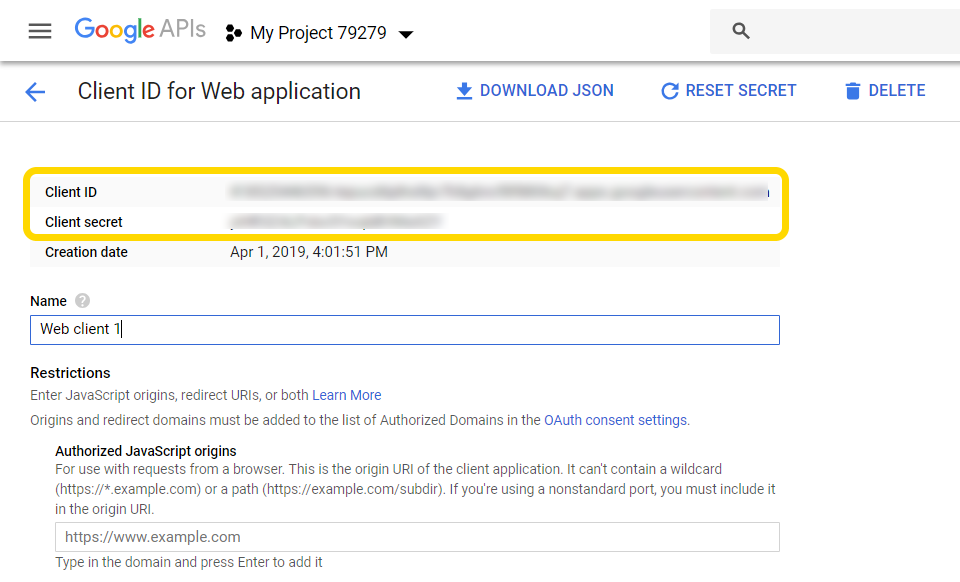
Go directly to the API Manager > Credentials page. There, select Credentials and click on the name of the credentials you have created. You can copy the Client ID and Client secret from there.
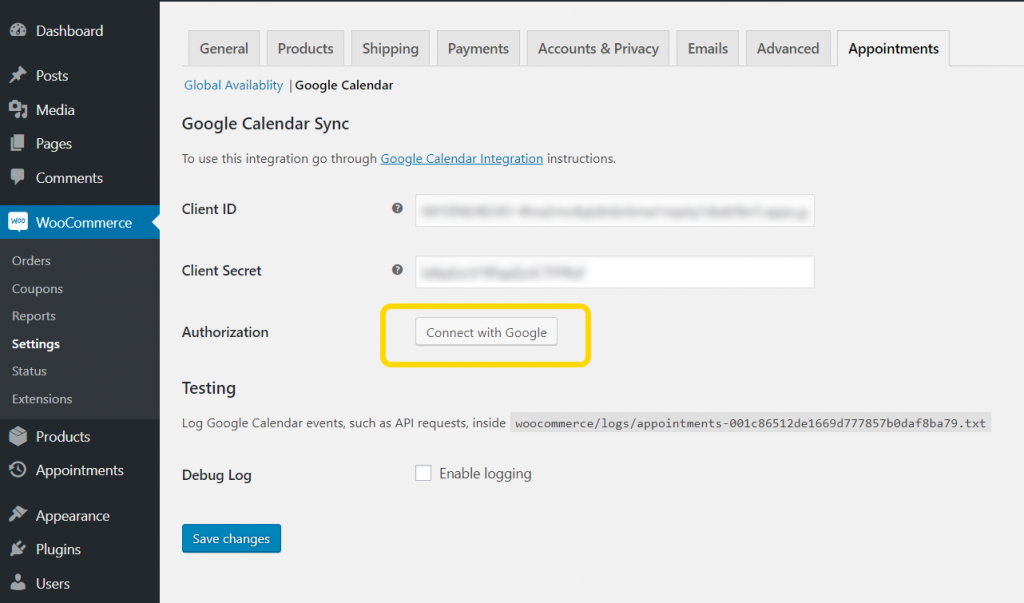
Enter these two in your store under WooCommerce > Settings > Appointments > Google Calendar. Finally, Save changes to your site.

Step 6: Authorize with Google
Before you authorize with Google, make sure you are running pretty permalinks on your site, otherwise, you will be redirected to Google Error. Select WordPress > Settings > Permalinks and set your permalink structure to anything other than Plain. Once you’ve entered all of your credentials and saved your settings, you will be provided with the option to authorize with Google. Now, Connect with Google to authorize the site with your project inside Developers Console.
Please note: If you are not logged into the Google account you are trying to synchronize with, sync will not be possible. In this case, log into the Google account that contains Google Calendar you will sync with.
Step 7: Choose Google Calendar
Once you have successfully authenticated your site with Google, you can choose the calendar to synchronize with. Make sure your select an actual calendar, since ‘N/A’ is not a calendar and when N/A is selected sync doesn’t work.

How 2-way Sync Works?
2-way sync works out-of-the-box, unless you choose to sync One way only. Besides that, take into account that only appointments with statuses ‘Confirmed’, ‘Paid’ and ‘Complete’ will sync to Google Calendar to make sure only appointments that will actually take place get synced.


One the other hand, Availability rules, created on your site, will not be synced to your Google Calendar, whereas Events from your synced Google Calendar will be added to your site as availability rules. When you edit availability rules from your synced events, changes will be pushed to your Google Calendar as well. Please note that deleted rules from your synced events will cancel events on your Google Calendar!

2-way Google Calendar Sync for Staff
Staff can sync their appointments with their own Google Calendar. Synchronization works in both directions (unless they choose to sync One Way only), so when events are added to Google Calendar, same time period is instantly blocked for products/services, which they are assigned to. Also, when appointment is edited on the site, it’s instantly updated on Google Calendar as well. Same goes when event is edited on Google Calendar – it’s instantly synced back to the site with updated data.
Step 1: Head to Staff Profile Settings
Go to your “Your Profile” link in admin.

Step 2: Scroll to “2-Way Google Calendar Sync”
Go to your “2-Way Google Calendar Sync” section of your profile page.

Step 3: Authorize with Google Account
Authorize with Google Account, where Calendar you want to sync is present.

Step 4: Select Google Calendar
Select Google Calendar you want to sync your appointments with.

Step 5: Manually Sync for the first time (optional)
You can manually sync if you want to pull events instantly. Automatic sync is performed each hour or live if live sync is configured for the site.

Synced Events on Your Site
Events that have been synced to your website can be viewed as availability rules. By default, rules have priority set to 5, which overrides all other rules, regardless where they are set (global, product or staff level). This make sure synced events disable all availability on your site. You can override this by setting priority to 10 or more, depending on your needs.
Main calendar sync is visible inside WooCommerce > Settings > Appointments screen, under global availability rules panel:
When staff syncs their calendar, events are visible under their profile edit screen as seen below:
